How to Properly Wash Your Car: Preventing Scratches and Swirls
Understanding the Enemy Swirl Marks and Scratches in Your Car's Paint
Alright, let's talk about the bane of every car enthusiast's existence: swirl marks and scratches. These unsightly blemishes can make even the shiniest paint job look dull and neglected. But what exactly *are* they, and how do they happen? Basically, they're tiny abrasions in the clear coat of your car's paint. Think of it like this: your paint is a delicate surface, and anything that rubs against it can potentially cause damage. That includes dirt, grit, improper washing techniques, and even the wrong kind of towel.
The most common culprit? Inefficient car washing. Think about it: you're dragging dirt and grime across the paint surface with a sponge or wash mitt. If you're not careful, those particles act like tiny sandpaper, leaving behind those dreaded swirl marks. Even seemingly harmless things like automatic car washes can be surprisingly abrasive, especially if their brushes are old or dirty. So, understanding the enemy is the first step in preventing it!
The Two-Bucket Method Your First Line of Defense Against Car Wash Scratches
This is the cornerstone of scratch-free car washing. Seriously, if you're not using the two-bucket method, you're doing it wrong. Here's the breakdown:
- Bucket 1 (Wash Bucket): Filled with car wash soap and water. This is where you'll dip your wash mitt to pick up soapy water for cleaning.
- Bucket 2 (Rinse Bucket): Filled with *clean* water. This is where you'll rinse your mitt *after* each section you wash. The goal is to remove dirt and debris from the mitt *before* you dip it back into the wash bucket.
Why is this so important? Because it prevents you from transferring the dirt you've picked up from your car back into the wash bucket. Imagine constantly dipping a dirty mitt into your soapy water – you're essentially creating a dirty soup that you're then using to scrub your car! The two-bucket method keeps your wash water clean and significantly reduces the risk of scratching.
Bonus points: Add a grit guard to the bottom of each bucket. These simple plastic inserts trap dirt that falls off your mitt, preventing it from being stirred up and re-deposited onto your car. They're cheap and incredibly effective.
Choosing the Right Car Wash Soap and Wash Mitt for Scratch Prevention
Not all car wash soaps are created equal. You want a pH-neutral soap that's specifically designed for automotive use. Avoid dish soap! It's too harsh and can strip away wax and other protective coatings. Look for soaps that are labeled as "pH-balanced" or "safe for clear coats."
Examples of great car wash soaps:
- Meguiar's Gold Class Car Wash Shampoo & Conditioner: A classic choice, known for its rich lather and gentle cleaning power. Around $10-$15 per bottle.
- Chemical Guys Mr. Pink Super Suds Car Wash Soap: Another popular option, produces a ton of suds and smells great. Around $20-$25 per bottle.
- Adam's Polishes Car Shampoo: A premium soap that's highly concentrated and offers excellent cleaning performance. Around $25-$30 per bottle.
Now, let's talk about wash mitts. The material of your wash mitt is crucial. Microfiber is the gold standard. It's soft, absorbent, and effectively lifts dirt away from the paint surface. Avoid sponges! They tend to trap dirt and can easily scratch your car. Sheepskin mitts are also a good option, but they require more maintenance.
Recommended wash mitts:
- Meguiar's Microfiber Wash Mitt: A reliable and affordable option. Around $10-$15.
- Chemical Guys Chenille Microfiber Premium Wash Mitt: Super plush and gentle on paint. Around $15-$20.
- The Rag Company Cyclone Premium Wash Mitt: High-quality microfiber and durable construction. Around $20-$25.
The Importance of Pre-Washing Rinsing and Foam Cannons
Before you even touch your car with a wash mitt, you need to remove as much loose dirt and grime as possible. This is where pre-washing comes in. The goal is to blast away any surface contaminants that could scratch your paint during the washing process.
The best way to pre-wash is with a pressure washer and a foam cannon. A foam cannon mixes car wash soap with water and air to create a thick, clinging foam that covers your car. This foam dwells on the surface, loosening dirt and grime before you even start washing.
If you don't have a pressure washer, you can still pre-wash with a garden hose and a strong spray nozzle. Just make sure to thoroughly rinse your car from top to bottom before moving on to the washing stage.
Foam Cannon recommendations:
- Chemical Guys Torq Foam Cannon: A popular and well-regarded option. Requires a pressure washer. Around $50-$60.
- MTM Hydro PF22 Foam Cannon: A high-quality foam cannon known for its thick foam production. Requires a pressure washer. Around $80-$100.
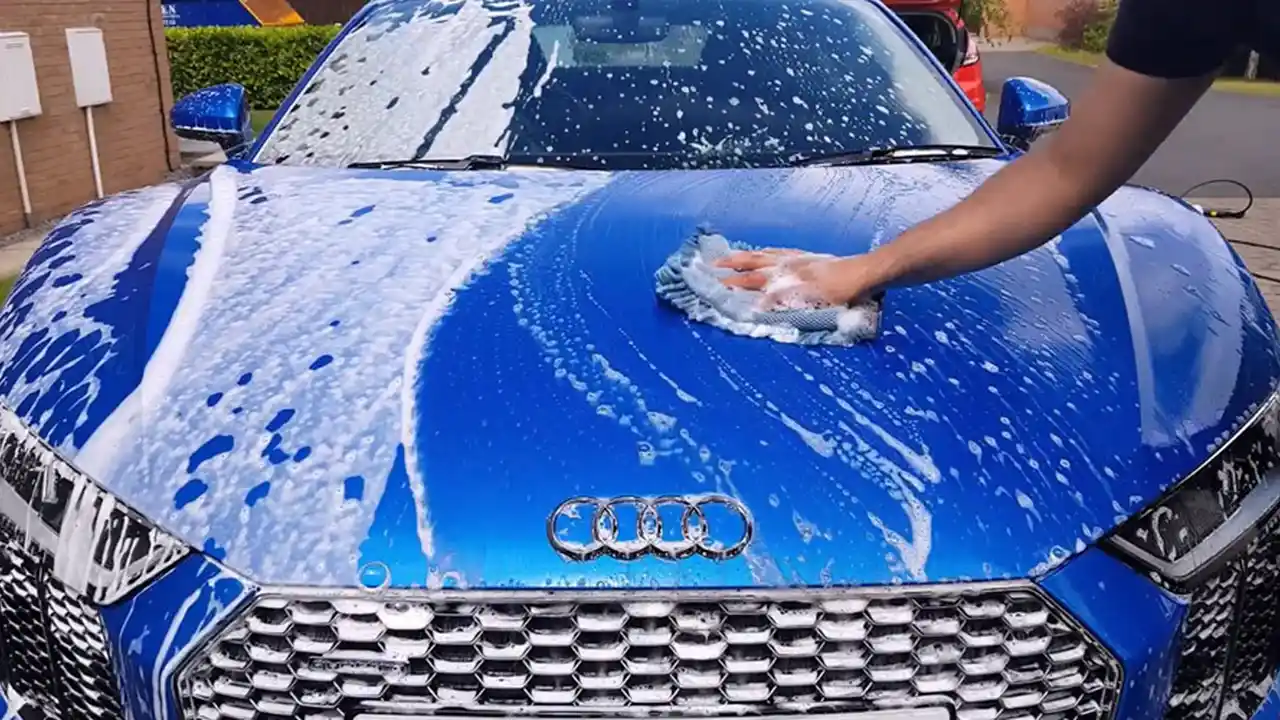
The Washing Process Top to Bottom and Straight Lines
When washing your car, always work from top to bottom. This prevents dirty water from running down onto areas you've already cleaned. Use straight, overlapping lines with your wash mitt. Avoid circular motions, as these can create swirl marks.
Rinse your mitt frequently in the rinse bucket, and always use a fresh section of the mitt for each area of the car. Don't be afraid to go over heavily soiled areas multiple times. Just be gentle and let the soap and water do the work.
Drying Your Car The Right Way Avoiding Water Spots and Scratches
Drying is just as important as washing when it comes to preventing scratches and swirl marks. The wrong drying method can undo all your hard work.
The best way to dry your car is with a microfiber drying towel. These towels are super absorbent and gentle on paint. Avoid using old bath towels or chamois cloths, as these can be abrasive.
There are two main types of microfiber drying towels:
- Waffle Weave Towels: These towels have a textured surface that helps to trap water and lift it away from the paint.
- Plush Microfiber Towels: These towels are super soft and absorbent, making them ideal for delicate paint finishes.
Drying towel recommendations:
- The Rag Company Pylon 20" x 40" Microfiber Drying Towel: A great all-around drying towel. Around $20-$25.
- Chemical Guys Woolly Mammoth Microfiber Drying Towel: Super plush and incredibly absorbent. Around $25-$30.
To dry your car, simply lay the towel flat on the surface and gently pat it dry. Avoid dragging the towel across the paint, as this can cause scratches. If the towel becomes saturated, wring it out and continue drying.
Another option is to use a leaf blower to dry your car. This is a touchless method that eliminates the risk of scratching. Just make sure to use a clean, filtered air source.
Waxing and Sealing Protecting Your Paint from the Elements
Waxing or sealing your car's paint is essential for protecting it from the elements and preventing scratches. A good wax or sealant will create a barrier between your paint and the environment, shielding it from UV rays, acid rain, and other contaminants.
There are two main types of paint protection:
- Wax: Wax is a natural product that provides a warm, glossy shine. It typically lasts for a few weeks to a few months.
- Sealant: Sealant is a synthetic product that provides longer-lasting protection than wax. It typically lasts for several months to a year.
Wax and sealant recommendations:
- Meguiar's Gold Class Carnauba Plus Premium Paste Wax: A classic carnauba wax that provides a deep, rich shine. Around $20-$25.
- Chemical Guys Butter Wet Wax: Easy to apply and provides a slick, glossy finish. Around $20-$25.
- Meguiar's Ultimate Liquid Wax: A synthetic sealant that provides long-lasting protection. Around $25-$30.
- Griot's Garage Best of Show Wax: A premium wax that provides exceptional shine and protection. Around $40-$50.
Apply wax or sealant according to the manufacturer's instructions. Typically, you'll apply a thin, even coat to the paint surface and then buff it off with a clean microfiber towel.
Quick Detailing Spray Maintaining Your Shine Between Washes
Quick detailing spray is a great way to maintain your car's shine between washes. It can be used to remove light dust, fingerprints, and water spots. It also adds a layer of protection to your paint.
Quick detailer recommendations:
- Meguiar's Ultimate Quik Detailer: A popular and effective quick detailer. Around $10-$15.
- Chemical Guys Hybrid V7 Optical Select High Gloss Spray Sealant & Detailer: Provides a glossy finish and adds a layer of protection. Around $15-$20.
Simply spray the quick detailer onto a clean microfiber towel and wipe down the surface of your car.
Clay Bar Treatment Removing Embedded Contaminants
Over time, your car's paint can become contaminated with embedded particles like brake dust, tree sap, and industrial fallout. These contaminants can't be removed with washing alone. That's where a clay bar comes in.
A clay bar is a pliable bar of clay that you rub over the surface of your paint to remove embedded contaminants. It's a relatively simple process, but it can make a big difference in the appearance of your car.
Clay bar recommendations:
- Meguiar's Smooth Surface Clay Kit: Includes a clay bar, detailer spray, and a microfiber towel. Around $20-$25.
- Chemical Guys Clay Bar Kit: Another popular clay bar kit. Around $20-$25.
To use a clay bar, first wash and dry your car. Then, spray the surface with detailer spray and rub the clay bar over the paint in straight, overlapping lines. You'll feel the clay bar pick up the contaminants. When the clay bar becomes dirty, fold it over to reveal a clean surface.
Paint Correction Polishing Out Scratches and Swirls
If your car already has scratches and swirl marks, you may need to perform paint correction. This involves using a machine polisher to remove a thin layer of clear coat, effectively leveling out the imperfections.
Paint correction is a more advanced process that requires some skill and experience. If you're not comfortable using a machine polisher, it's best to leave it to a professional.
Paint correction products:
- Meguiar's DA Microfiber Correction System: A popular system for removing scratches and swirl marks. Requires a dual-action polisher. Around $150-$200 for the kit.
- Griot's Garage BOSS G15 Long Throw Orbital Polisher: A high-quality polisher for paint correction. Around $300-$400.
Remember, always test your products in an inconspicuous area before applying them to the entire car.
Final Thoughts Preventing Scratches is an Ongoing Process
Keeping your car scratch-free is an ongoing process that requires attention to detail and the right techniques. By following these tips, you can significantly reduce the risk of scratching your paint and keep your car looking its best for years to come. Happy washing!
:max_bytes(150000):strip_icc()/277019-baked-pork-chops-with-cream-of-mushroom-soup-DDMFS-beauty-4x3-BG-7505-5762b731cf30447d9cbbbbbf387beafa.jpg)